Parlor Set Up
This is a feature that VAS is preparing for beta testing. If your dairy is interested in testing out this feature, please Contact Us.
Setting up a new parlor is done from the Parlors page. You can find this feature under the ParlorComp menu.
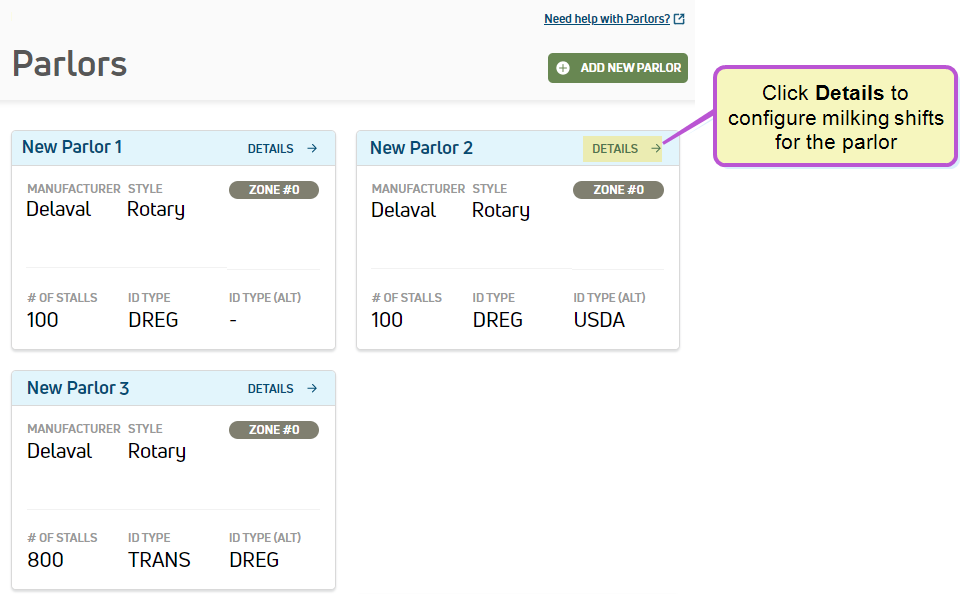
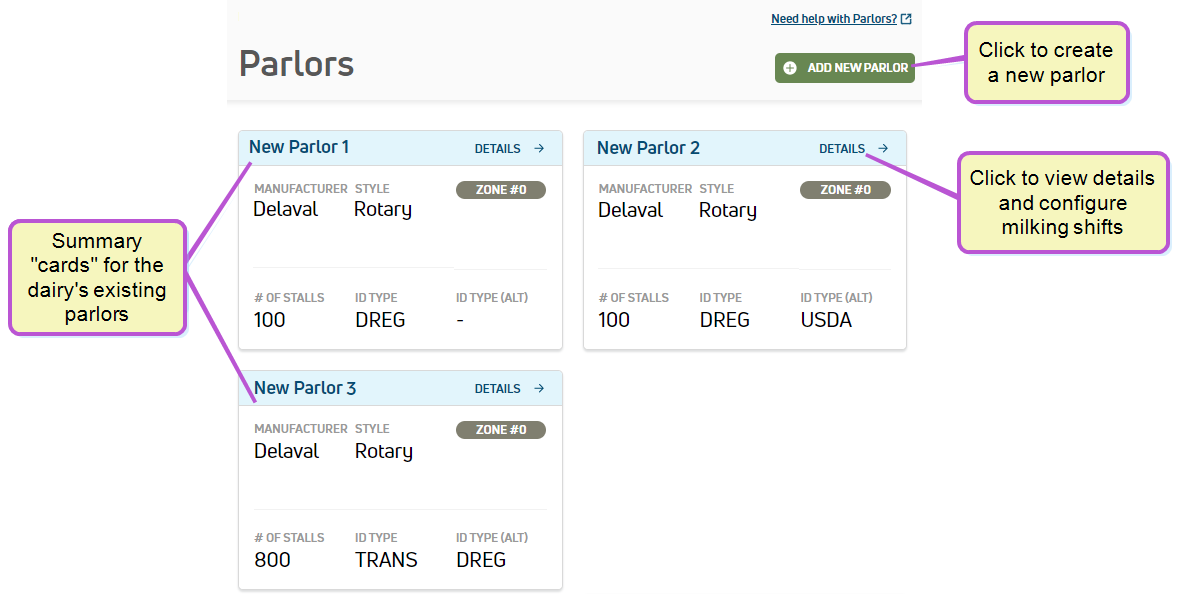
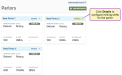
The Parlors page shows all of the parlors configured for your dairy, presenting a quick overview of their configuration (name, manufacturer, number of stalls, etc.). Each parlor "card" on this page includes a Details link that allows you to view and edit parlor details and milking shifts:
You can quickly check on the connection status of your parlor integration(s) by clicking on the Integration Status icon (located at the top of PULSE Platform) to open the Integration Status page and view the ParlorComp card:
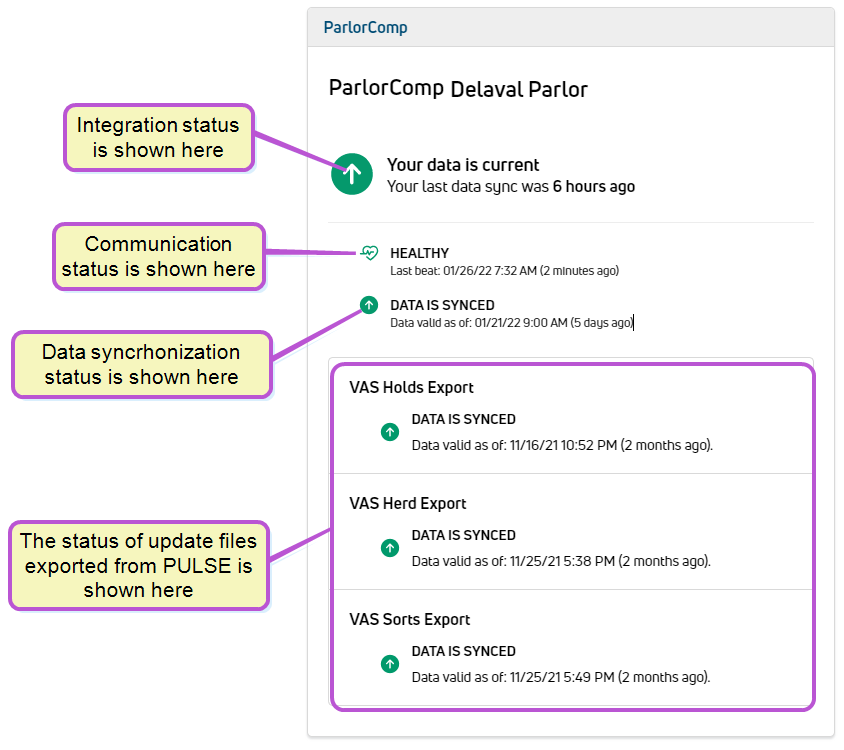
The ParlorComp card contains numerous indicators to help you identify the health of the connection between your parlor(s) and PULSE. The ParlorComp card also shows the status of the file exports from the PULSE herd data to the parlor software. These exported files are used to keep the parlor software up to date and include the following:
- VAS Holds Export: Contains the animals with user-assigned parlor hold codes.
- VAS Herd Export: Contains the animal status updates.
- VAS Sorts Export: Contains the animals with user-assigned sort gate codes.
See Integration Status to learn more about the Integration Status page and the indicators used.
See the topics below to get started with setting up a parlor:
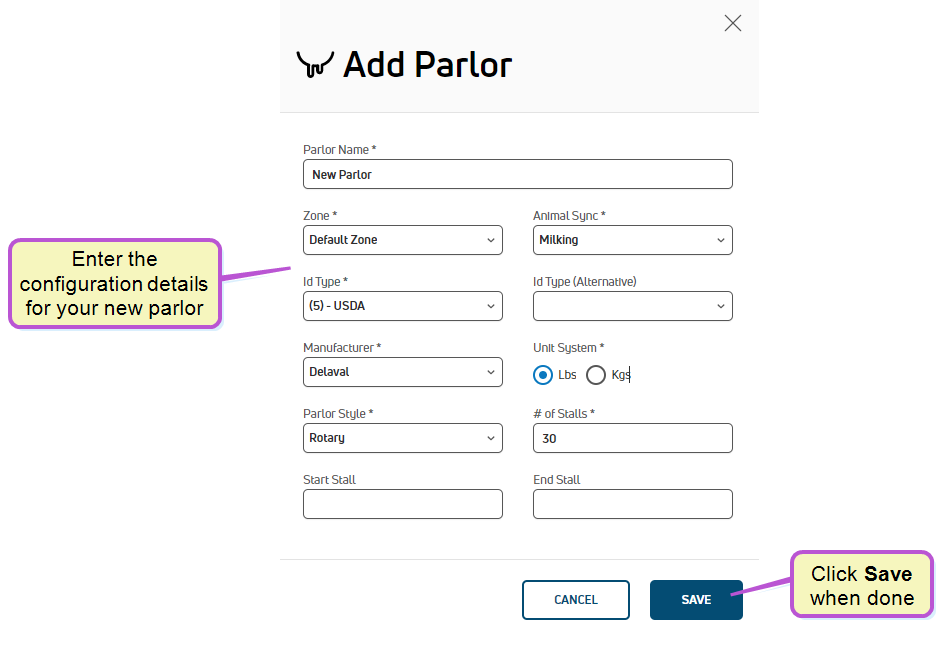
- On the Parlors page, click Add New Parlor to open the Add Parlor side panel (see example below).
- Enter the configuration details for your new parlor. Note that required fields are marked with the * (asterisk) symbol.
 For help filling out parlor details, click here!
- Parlor Name: The name assigned to the parlor.
- Zone The term "Zone" represents different dairy locations. PULSE Platform Zones may be different physical dairy locations (for example, multiple locations across the state or country) or different user-defined locations within a single dairy site (for example, Pens 1-100 are Zone 1, Pens 101-200 are Zone 2, etc.).: The location within the dairy where the parlor is located. Most dairies have only one zone and should select the only zone available for this field.
- Animal Sync: The types of animal records shared with the parlor system. Note that "Milking" animals will always be included in the send of animal records to the parlor system. It is up to the user to decide if they also want to include animals that are dry or young stock to the parlor database:
- Milking—Animals that are currently lactating.
- Dry—Animals that are dry are no longer lactating. (Optional)
- Heifers—Animals that have not entered their first lactation. (Optional)
- Id Type: Data field (item) used to store transponder or electronic (RFID) identification numbers assigned to animals. This is the primary identification that is read by the parlor system to identify animals that enter the parlor.
- Id Type (Alternative): Data field (item) used to store transponder or electronic (RFID) identification numbers assigned to animals. This is the secondary identification that is read by the parlor system to identify animals that enter the parlor. This field is optional.
- Manufacturer: The parlor manufacturer.
- Unit System: The measurement unit by which data from the parlor comes into PULSE Platform. This is not the measurement system by which data is displayed in PULSE Platform; that is set separately.
- Parlor Style: The parlor type (parallel, herringbone, or rotary).
- # of Stalls: The number of milking stalls in the parlor.
- Start Stall: The number of the first stall used by the parlor.
- End Stall: The number of the last stall used by the parlor.
- Click Save when done.
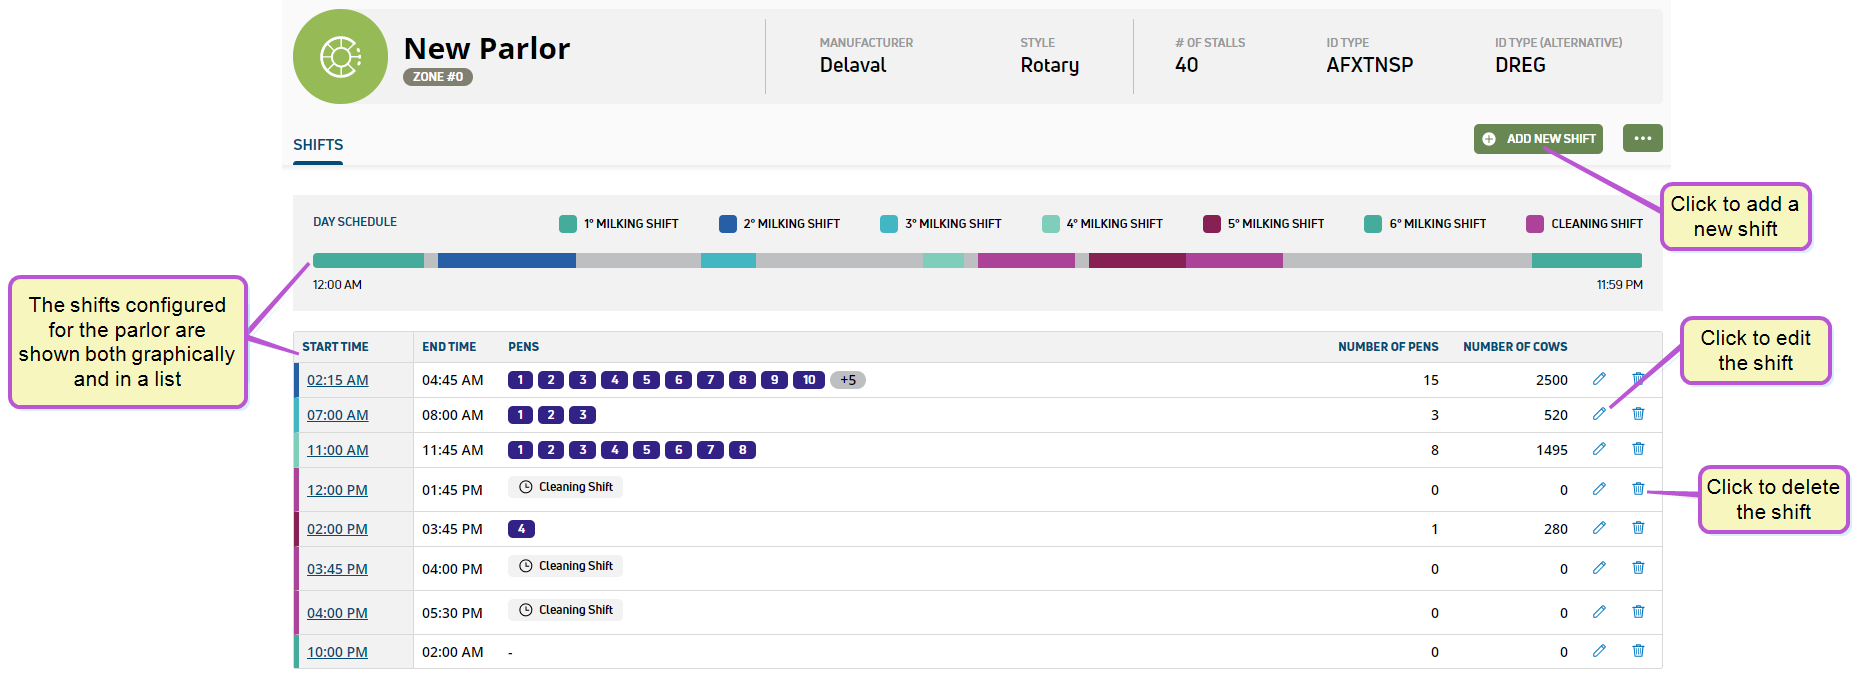
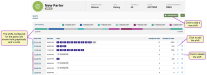
- On the Parlors page, locate the parlor where you want to set milking shifts, and click Details at the top right corner of the parlor card to open the parlor details page:
The details page presents your milking shifts both graphically in a bar at the top of the page and in a list below the bar:
 Tell me more about the parlor details page!
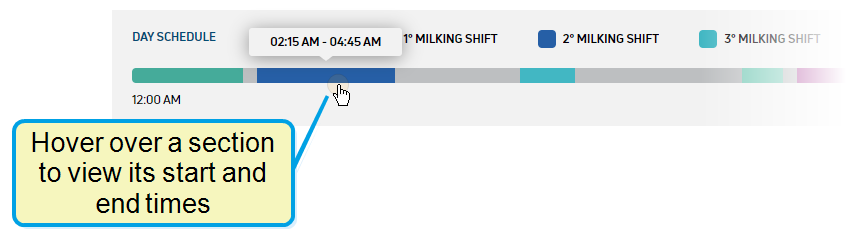
Along the top of the details page is a color-coded bar showing the parlor's shifts. Hover over a section of the bar to view its start and end times:

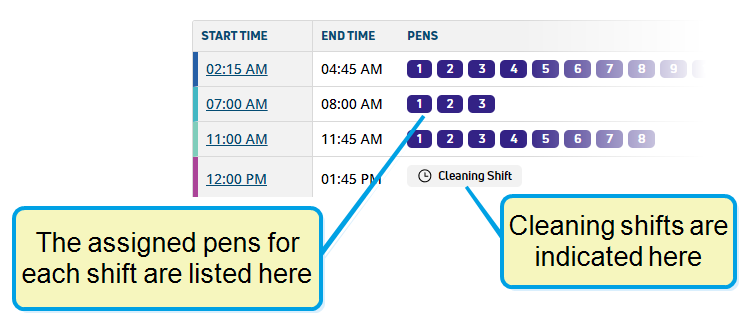
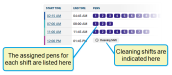
Below the bar, each shift is listed along with any assigned pens. Or, if it's a cleaning shift, that will be indicated:
- Click the Add New Shift button (see example above) to open the Add Shift side panel:

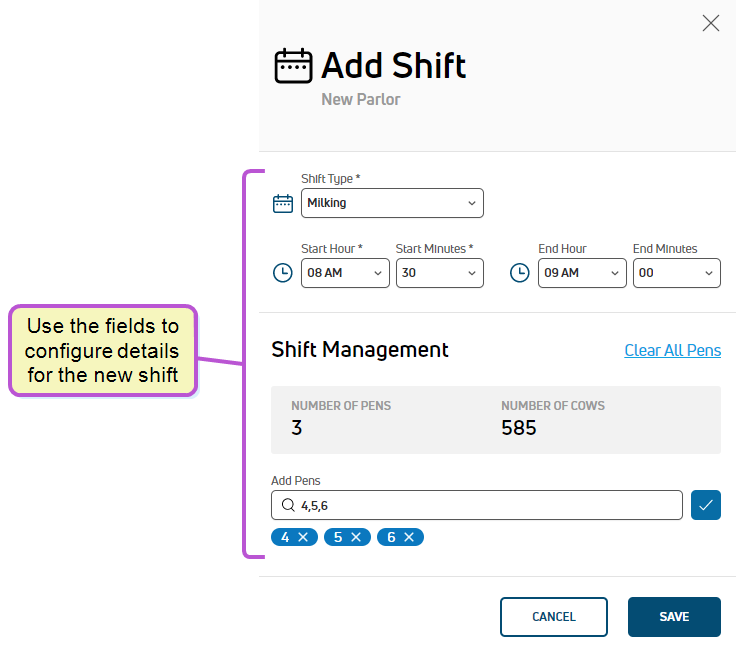
- Enter the details for the new milking shift, then click Save when done.IMPORTANT: The start and end times configured in this step will determine when milk data is imported for each shift.For help filling out the shift details, click here!
- Shift Type: Select either a Milking or Cleaning shift.
- Start and End Hours/Minutes: Enter the times at which you want the new shift to start and end. The sytem warns you when you attempt to create a shift at an already existing shift time.NOTE: The format of the start and end times can be changed from standard time to 24 Hour time in your PULSE Platform account settings. See Edit Your User Account to learn more.
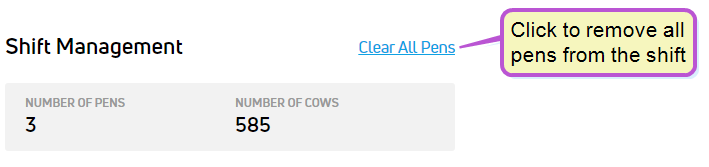
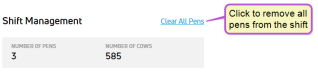
- Shift Management: This section displays the number of pens currently assigned to the shift as well as the total number of animals in those pens. You can click the Clear All Pens link to remove all of the pens assigned to the shift:
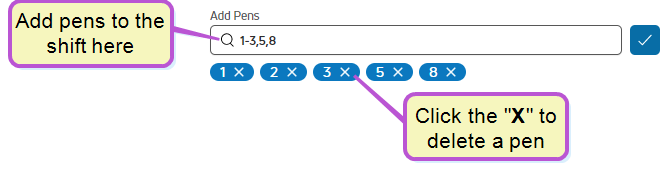
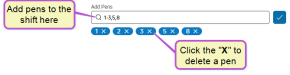
- Add Pens: Enter the numbers of the pens you want assigned to the shift, separated by commas, or use a dash to indicate a range of pens. Click the "x" beside a pen number to delete it from the shift:
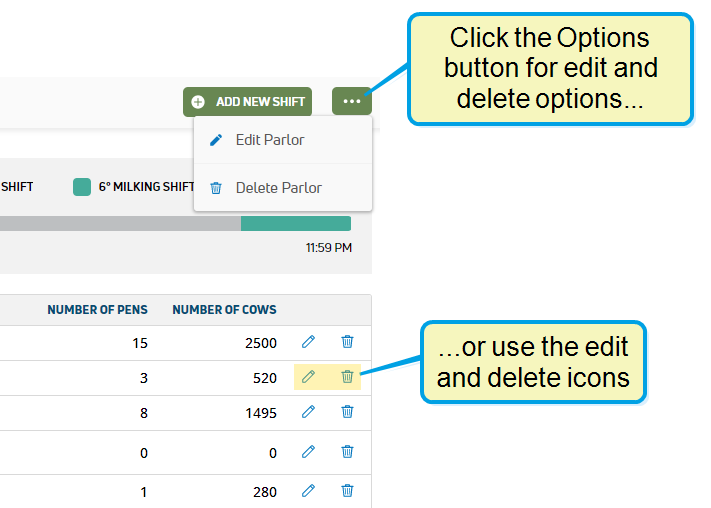
- If you need to edit or delete shifts, follow the guidelines below:
- Edit Shift Details: To edit a shift's details, click the edit icon
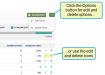
 or click the Options button
  and select Edit Parlor.
 - Delete a Shift: To delete a shift, click the delete icon
 or select Delete Parlor from the Options button menu: