Step 3: Choose Your Bulls
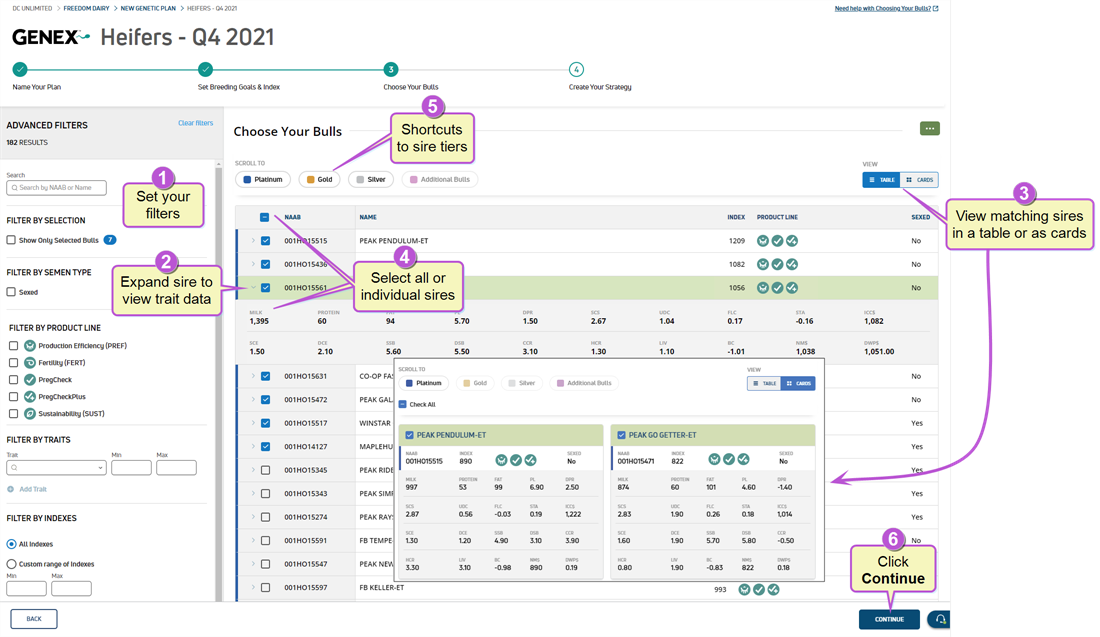
The third step, Choose Your Bulls, provides you with options to choose mating sires using multiple filters. You can also use this step to add any existing semen inventory to your genetic plan and set your available doses.
Expand the topics below to learn more about choosing your bulls, including additional bulls, setting dose limits, or viewing a genetic summary:
Follow the steps below to choose your bulls:
|
1
|
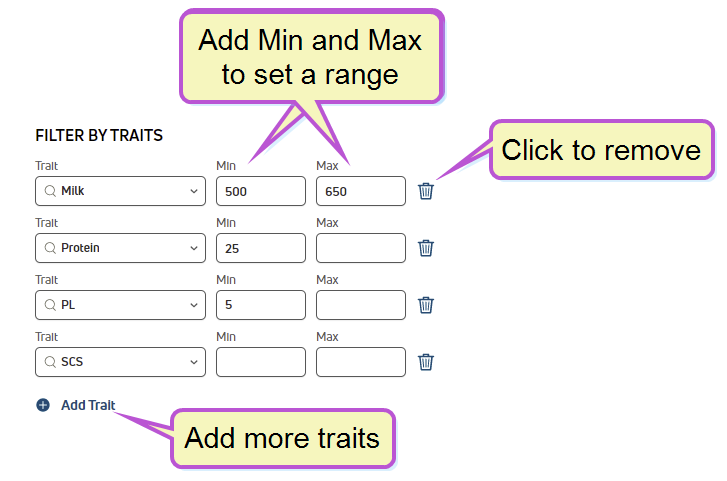
Set your filters. You have multiple filter options: Use this filter to display only the sires you manually selected from the listing on the right side of the page. Quickly locate sires using the Search field to find bulls by NAAB Click the Sexed checkbox to include only GENEX sexed semen products. Filter bulls by GENEX product line. Filter by specific traits and trait values. You can add a minimum or maximum value for each trait, or add both to set a range:
Click the delete icon Filter by numeric Index values for the bulls. You can add a minimum or maximum value for each trait, or add both to set a range. Click Clear filters to remove all filters and start over. |
|
2
|
Expand individual bulls to view Predicted Transmitting Ability (PTA
|
|
3
|
View matching bulls in a table or card format. |
|
4
|
Click the top checkbox to select all bulls that match your criteria, or click individual bulls to select a subset. |
|
5
|
Click on a bull tier to quickly scroll to that level. |
|
6
|
Click Continue to proceed to Step 4: Create Your Strategy. |
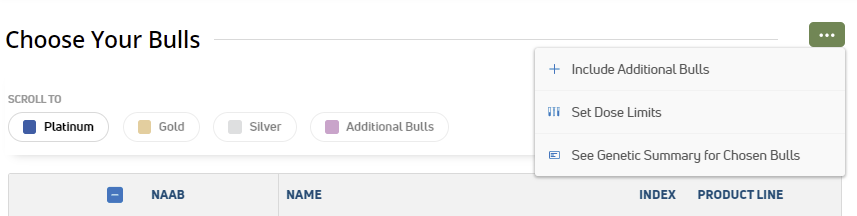
To add bulls to your plan that are not on the GENEX marketing list, use the Options button ![]() and select Include Additional Bulls:
and select Include Additional Bulls:
Use the side panel to find the bull by NAAB code or Name, and click Save to include the bull in your plan:
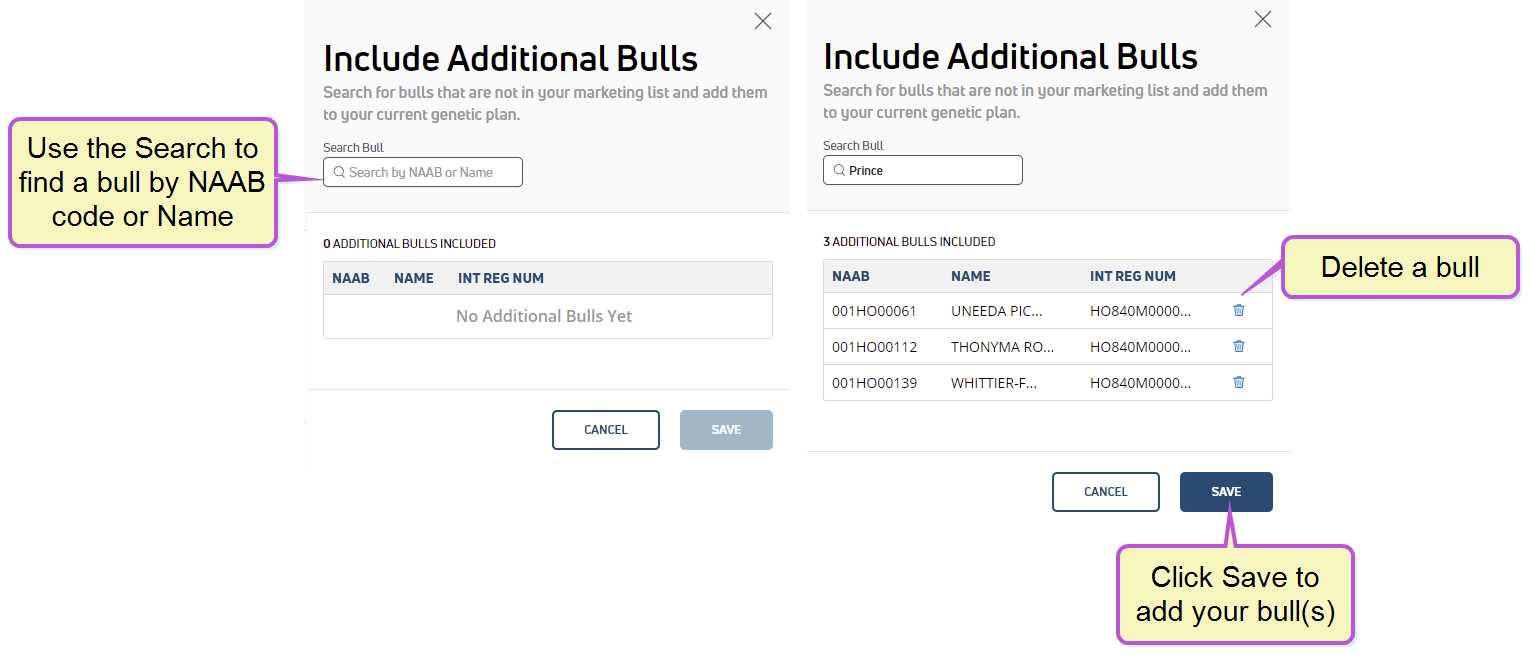
If you make a mistake or want to remove a bull, click the delete icon ![]() for that bull.
for that bull.
If you have a specific number of doses available for GENEX or third-party bulls, use the Options button ![]() and select Set Dose Limits:
and select Set Dose Limits:
Use the side panel to enter the number of available doses and click Save to capture your settings:
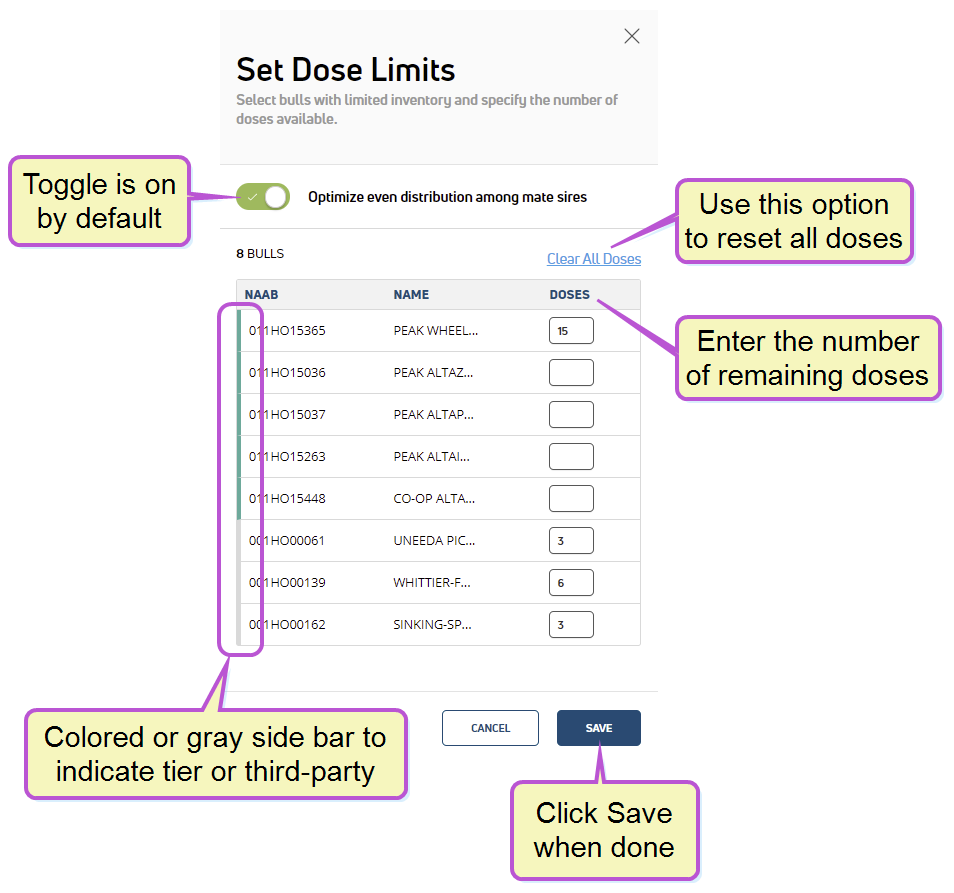
GENEX bulls are listed at the top of the list with a colored side bar to indicate the bull's tier. If applicable, third-party bulls are listed below with a gray side bar.
The side panel also includes the Optimize even distribution among mate sires option:
- By default, the option is enabled
 : All bulls in the plan are evenly distributed among females for mating. In other words, the same number of doses are used for each bull in the plan. This applies to the first choice sires only.
 - If disabled
 , the best bull is used for mating until his dose limit is exhausted. All other bulls without dose limits are evenly distributed according to the needs of the plan.
After you have selected the bulls for your plan, you can view a summary of the bulls' traits. Use the Options button ![]() and select See Genetic Summary for Chosen Bulls:
and select See Genetic Summary for Chosen Bulls:
The summary displays:
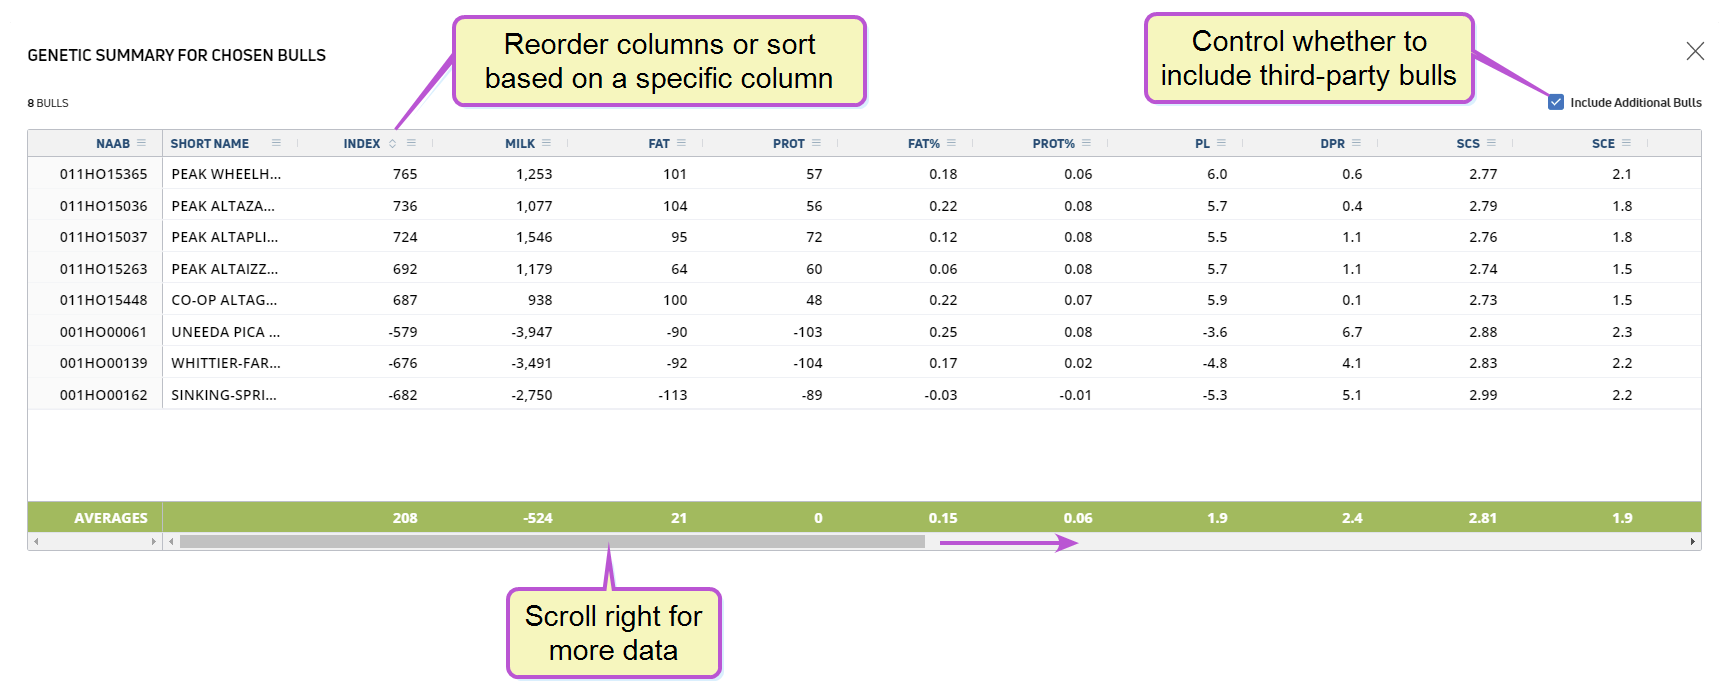
Scroll to the right to see additional genetic traits. If you added third-party bulls to your plan, use the check box at the top to show or hide them.
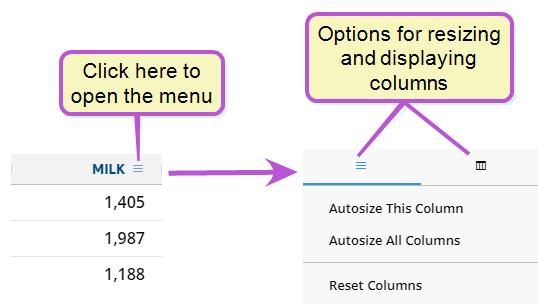
This page uses interactive column headers that allow you to rearrange the columns, adjust the column widths, and change which columns appear on the table. You can access most of these features by clicking on the column menu in the column you want to change:
Expand the topics below to learn more:
You can reorder the way columns display by clicking in the header of the column you want to move and dragging it to its new location.
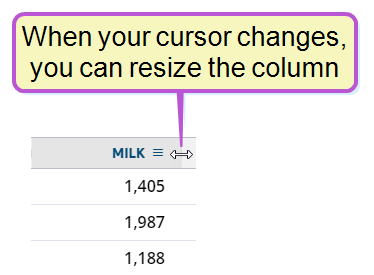
To adjust the width of a column, click and drag the right end of the column header left or right to shrink or expand the column accordingly:
From the first tab of the column menu, you can choose to automatically resize the selected column, resize all columns, or restore all columns to their default widths.
To add or remove columns from the page, click the second tab of the column menu, then use the checkboxes to select which columns to display:

Last Built: February 04, 2022